When a request for a custom-designed ring comes in, many jewelers skip an important element during the requirement stage: educating the customer about the difference between a CAD image and the actual finished product.
With jewelry CAD (Computer-Aided Design) renderings nowadays, the quality and details the design can appear hyper-realistic, even if that piece does not exist. Nonetheless, there are significant distinctions separating these images and what your finished piece will look like.
In this blog, we will explain these differences and the importance of trusting a good jewelry CAD designer who bears the responsibility to act as the initial infrastructure of a properly-produced jewelry item.
Expectations: How do CAD Images Differ From The Finished Item
The main difference is that the CAD file holds extra metal that will inevitably be removed during the finishing and polishing stage. Consequently, prongs look taller with sharper edges and the piece is, in general, appearing much bulkier than the real thing.
This is normal practice in jewelry design and involves many technical aspects to prepare a piece to cast. However, many customers complain that the finalized piece shipped to their door, if purchased online in this example, does not match the original CAD render image they saw during the buying process.
This is why it is important to choose the right CAD jewelry designer who understands the above mentioned and take high quality and fine proportions in their best interest for every designed jewelry item.
From CAD Model to Render: Utilitarian & Illustrative Explained
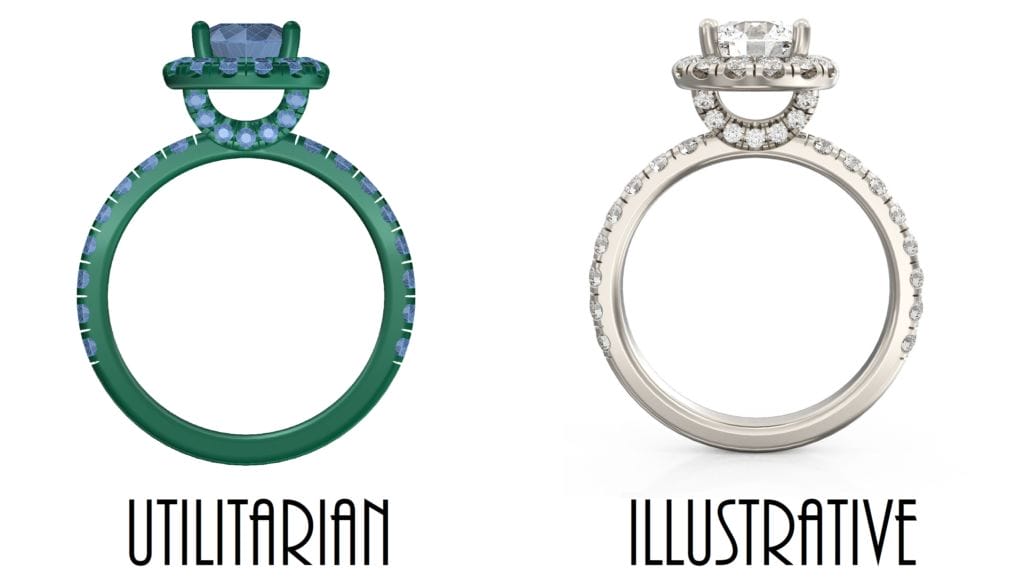
In a nutshell, an illustrative CAD reveals the visual details for a piece such as color and design details with the aim of making it appear as realistic as possible. A utilitarian CAD is normally a grayscale scheme that displays the exact shape of a wax model before it is sent to 3D printing or casting.
Below is an example of utilitarian & illustrative CADs for an engagement ring:
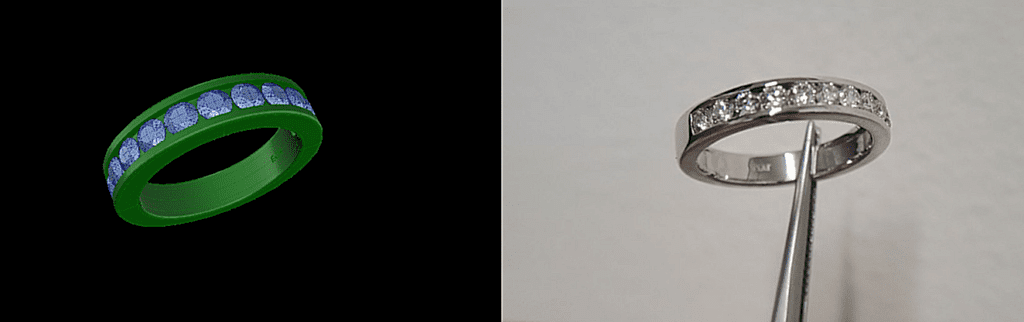
Blocky parts in CAD modeling: before and after effect
The most challenging step of CAD design for a successful cast are the narrow and tiny parts.
Since the prongs are small and narrow, they are quite a vulnerable element in casting jewelry the right way. For ring designs, prongs hold additional thickness and length to survive a vigorous cast.
From a customer’s perception, the design may look a bit startling and incomplete in CAD. This is why educating them about this process is important. Once casting is complete, the design will undergo delicate alterations for finalizing the product. A great stone setter will shorten prongs, apply the right polishing techniques, and allow the stone to sit perfectly in the gallery area.
If the prongs don’t come out accurately after casting, any repairing efforts would not bear the quality of a pristine finished piece. We want your designs to have a solid and beautiful appearance throughout your entire jewelry production stages.
At Sarkissian Luxury Studio, we thrive to provide the best quality CAD files with more than 50+ original designs daily with a turnaround of 24 hours. Our focus is to increase your productivity and minimize the risk of spending extra money on jewelry repairing or retouching headaches.